Learn gradually, starting by writing a script, draw a full-fledged comic using Clip Studio Paint... I have to admit that for me, thinking about all kinds of plot twists for a future comic is my favorite part of developing it. I will talk about other parts of this work and how Clip Studio Paint helps me in it in this tutorial article.
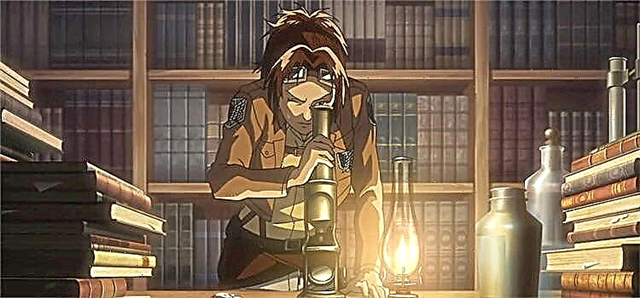
For clarity, I'm using my old project, the Torchwood comic strip, which tells the story of Captain Jack and John's adventures in the techno jungle. It is this work that can serve as an example of good character design and good work with textures.
I want to acquaint the reader with my technique of work and talk about the long journey that begins for me with the first sketches and familiarity with the comic book script (as well as all the mistakes that I make along the way).
I work on a Wacom Cintiq Companion 2, create presets, and use a 27 "Cintiq connected to a 21" iMac with 4GB of RAM to work on the final version.
Each page of a comic always requires a long and painstaking work, but the subsequent effort pays off, so always push yourself to work. However, try to make your comic work enjoyable.
To follow along with the tips below, you'll need to download a set of custom brushes.
01. Read the script
Run through the script and highlight key points.
As soon as you feel that the fear of a blank sheet has receded, re-read the script. Personally, while reading, I highlight significant moments in the text for each panel in a future comic, looking for the most important plot events: all this will help me tell the story better. I also make sketches and notes that I may need while working.
02. Sketch
Make the first drawings and then improve them.
At this stage, it is very important not to dwell on the imperfection of the first sketches, since they are easy to redo. I initially do very rough sketches, ignoring the anatomy, and then refine them, while thinking about where to place the bubbles for the cues. As a rule, I use Cintiq Companion 2 at this stage of my work.
03. Work on the peculiarities of the plot
Study the script and get reference material.
So, if the plot of a future comic book implies the presence of a large number of different types of vegetation in it, I will study vines, jungles and different types of mushrooms. Usually at this stage of the work, I pick up a pencil to make drawings and notes. Subsequently, they will help me create a complete world in the pages of the comics and a suitable environment for the characters. At this point in my work, I am transitioning to the 27-inch Cintiq.
04. Place characters in space
Use the Frame tool to create borders.
When the sketches are ready and the plot has been thoroughly studied, it's time to move on to work on the pages. I draw the borders of the panels with the "Frames" and then sketch the silhouettes of the characters inside with the Darker Pencil brush. This gives me the opportunity to appreciate the scale of my character work.
05 Add details
Add a new layer and then start working with details.
When I start to think that the characters' shapes are positioned correctly, I create a new layer and leave the silhouettes alone, starting work on the anatomy and the correction of the drawing. Here I am using the Darker Pencil brush again. After the basic lines are outlined, you can begin to improve the drawings.
06. Working with lines
When all the figures are finally put in their places, it's time to do some real drawing.
After that, my work with proportions is finished, and the problem of placing shapes in paper space is solved, it's time to create a new layer and work on the drawing. I usually use the Ink Pencil line brush to further refine my sketches. In my opinion, at this stage it is better to make only small changes, paying special attention to the chiaroscuro and texture.
07. Correcting bugs
Examine the resulting page and look for errors.
Putting the tool aside, I carefully examine the page to see what needs to be corrected in the drawings. Looking closely at the work, you may notice errors; before fixing them, I take some notes for myself. At this stage, remember that everything is fixable, since the drawing is not carved in stone.
08. Make the lines wider
Use the Neil's Ink Pencil to make the lines wider.
At this stage of work, you need to make the lines thicker and smoother using the Ink Pencil brush (I should think of a better name for this tool). The line is very important, it helps to correctly convey the light and shadow in the drawing, as well as the mass of the character, so work on the lines should be especially careful.
09. Add new details
A small detail can make a big difference. But here it is important not to overdo it.
Still using the Ink Pencil brush (I know, I know), I start to add shadows and lots of small details. In this case, it is better to avoid excessive decorativeness and not add too many details. Remember that sometimes the absence of an element can make no less impression than its presence.
10. Make corrections
If you are not completely happy with something about your work, it’s time to fix everything before it’s too late.
Looking closely at the page, I realize that I don't like the way Captain John's head looks. On a new layer I make a new sketch of the head and then correct it. At this stage of the work, reference materials are very helpful, you can use a mirror or photographs taken by the phone to convey the desired angle.
11. Pay attention to minor characters
Highlight minor characters with silhouettes and shadows.
As with the small details, I try not to overdo it, not to give too much attention to the supporting characters. In particular, I keep track of the line width when I work on the background. Silhouettes and strong shadows can help make minor characters stand out. They can get lost in the background if you paint them too pale.
12. Put the anatomy in order
Try to give your characters' shapes dynamism and do everything to make them look natural.
I'm not happy with Captain Jack's legs: they look a little odd in my first drawing, so I redraw them. Everything should be done to make the characters look alive and natural, and their figures are dynamic. I also work on supporting characters, trying to fit them into perspective.
13. Add texture
The Clip Studio Paint's texture brushes will help you add richness to your drawing.
Clip Studio Paint's excellent tools do my job better by helping to convey smoke and air in my drawing. I also add some shading to give the drawing more expressiveness. In the end, I complete the work with the vegetation in the background and add lights to the first panel.
14. Final touches
Make the final changes before finishing.
When the comic is almost finished, I slightly tweak Captain John's face on the bottom panel and add some finishing touches to the background. Then I go to the top right panel and draw the energy waves. Once I know I'm happy with the work, I save the comic as a monochrome TIF at 500dpi and then sit back in my chair. Phew!
This article originally appeared in issue 149 of ImagineFX Magazine, the world's leading magazine for digital artists.
We advise you to see:
Comic lovers and those who want to try to create something of their own, it will be especially interesting to watch the video on how to make a comic!